 Measure Killer
Run your first scan
Open a .pbix or .pbip in Power BI Desktop, run a Measure Killer scan, and read the results — the free local desktop flow, for personal and commercial use.
Last updated · July 9, 2026
With a license key — paid Enterprise or an active free trial — Measure Killer unlocks upgraded features in this same flow; see What changes with a license below. To scan models hosted in the Power BI Service instead, see Run your first online scan.
Open the file in Power BI Desktop
Measure Killer attaches to a running Power BI Desktop instance — it
doesn’t read Power BI files on its own. Open the file you want to analyze
in Power BI Desktop (.pbix, .pbip, or any other supported format),
then launch Measure Killer (from the Start menu, or from the External
Tools ribbon if you ran the admin
installer).
Pick the mode
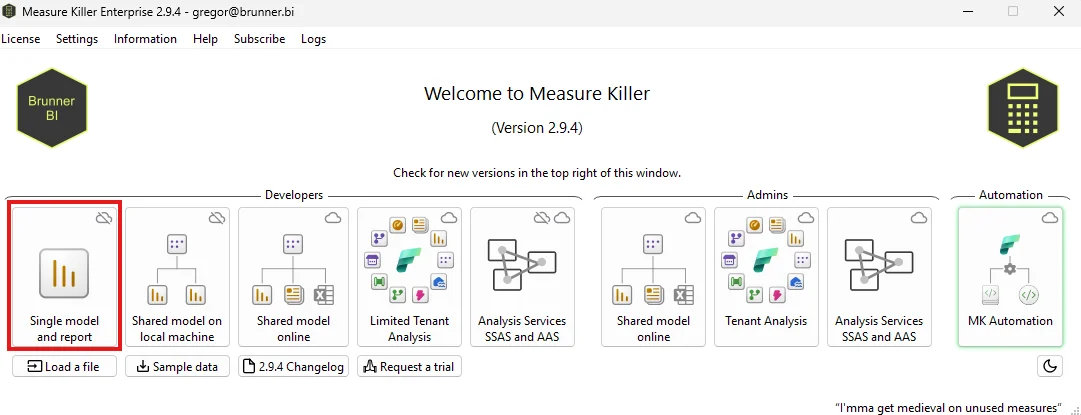
On the Measure Killer welcome screen, click Single model and report (under the Developers group) — this is the local desktop scan mode for a single model open in Power BI Desktop.
Select your open file
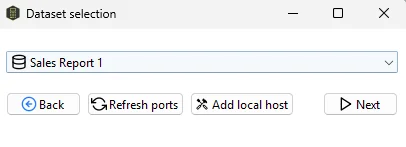
Measure Killer detects every Power BI Desktop instance it can see and lists them in the Dataset selection dialog. Pick the file you have open from the dropdown and click Next.
Run the scan
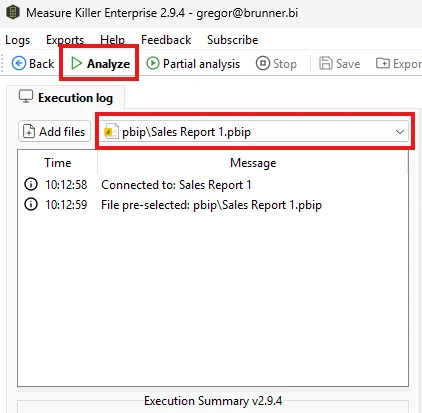
Double-check the selected file shown in the toolbar, then click Analyze. The scan parses the model, walks every visual on every page, and indexes references between them.
Read the results
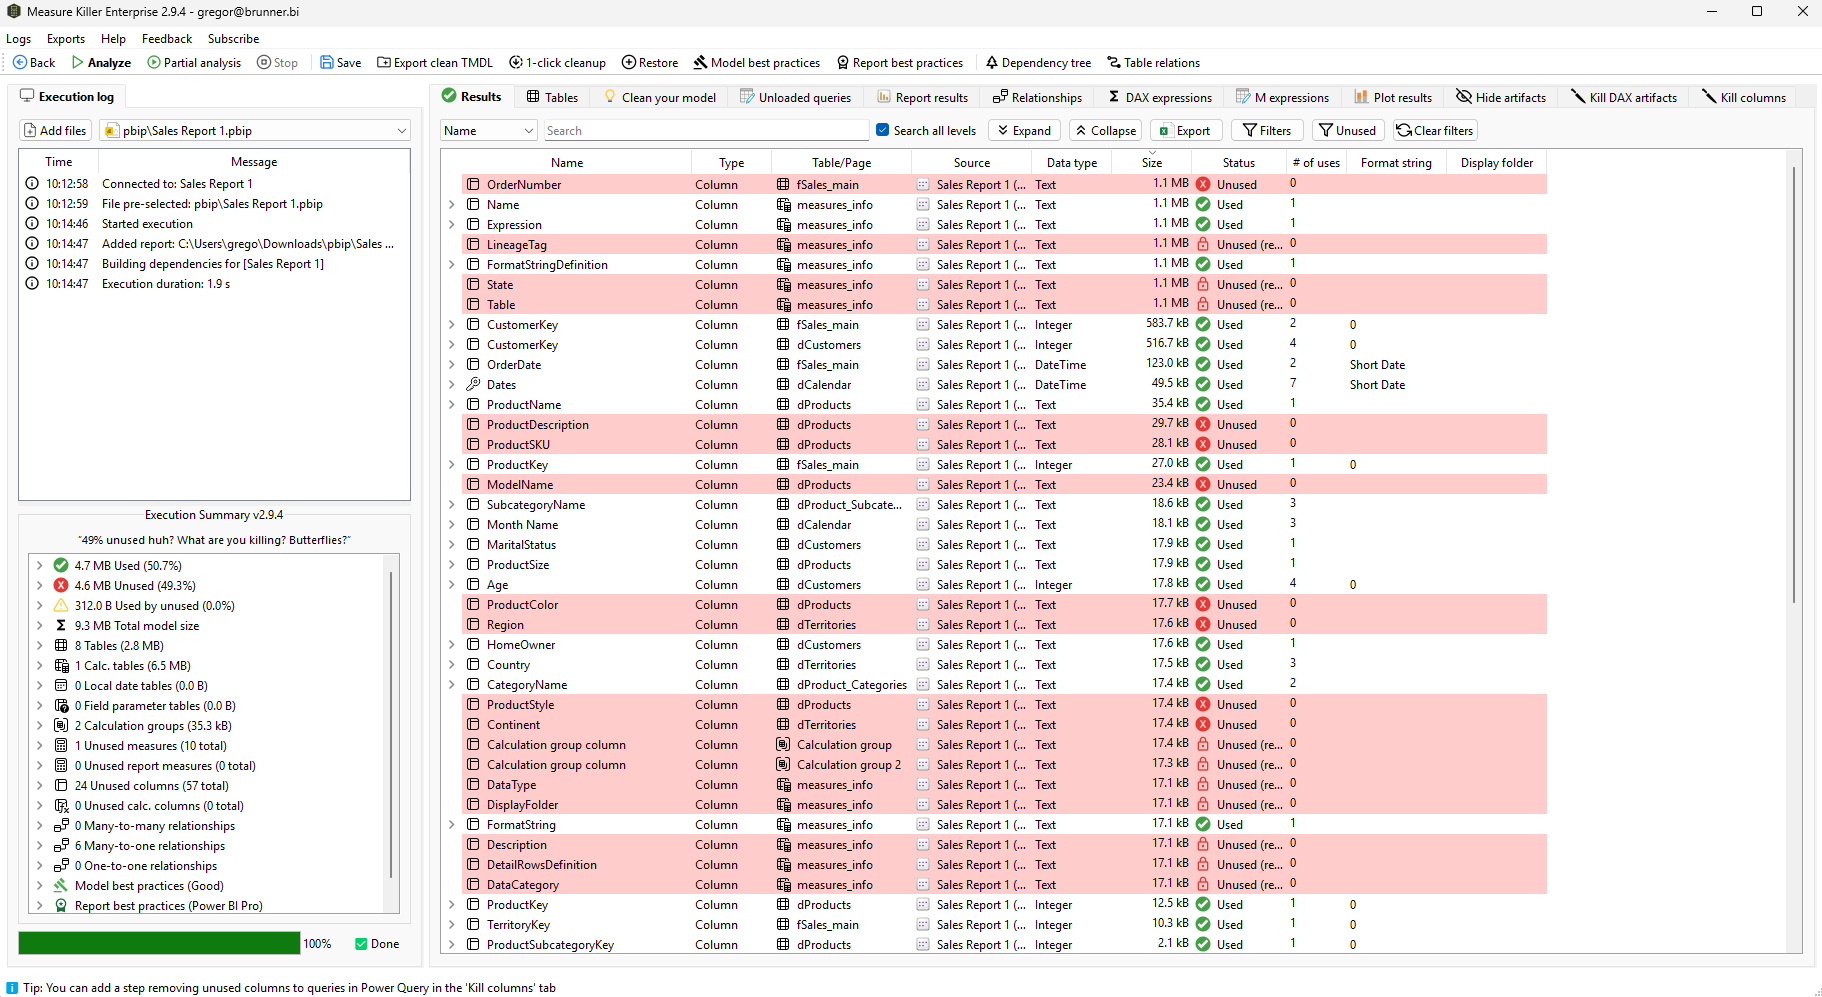
When the scan finishes, the main pane shows the Where-used view: every column, measure, table and relationship in the model, with the table it belongs to, the source field, data type, size, and a count of how many visuals, filters, measures or other objects reference it. Rows highlighted in red are flagged as unused — nothing in the report consumes them, so they’re safe to remove.
Re-scan after every change
After making changes in Power BI Desktop, click Analyze in Measure Killer again to refresh the view. Whether you also need to save the file first depends on what you changed:
- Semantic-model changes — adding or removing a measure, editing a DAX expression, changing a column type or a relationship — are picked up live from the running Power BI Desktop instance. No save needed; just click Analyze again.
- Report-layer changes — adding or removing a visual, tweaking a visual-level filter, editing a page — only reach Measure Killer once they’re written to disk. Save the file in Power BI Desktop first, then click Analyze again.
Until you re-analyze, the Measure Killer view still reflects the previous scan and any cleanup decisions will be based on stale data.
What changes with a license
The desktop flow is the same in every edition, but Measure Killer enables upgraded features as soon as it sees a license key — a paid Enterprise key and an active free trial key both unlock the same experience. The most visible difference is the Clean your model tab, which turns “I scanned my model” into “I have a prioritized cleanup plan”. It lists step-by-step optimization suggestions — remove unused artifacts, disable auto-datetime, prune unused field-parameter tables, drop hidden visuals in bookmarks, and so on — with an estimated reduction in model size for each one, ordered so the biggest wins are at the top. The Clean your model tab isn’t available on the free edition.
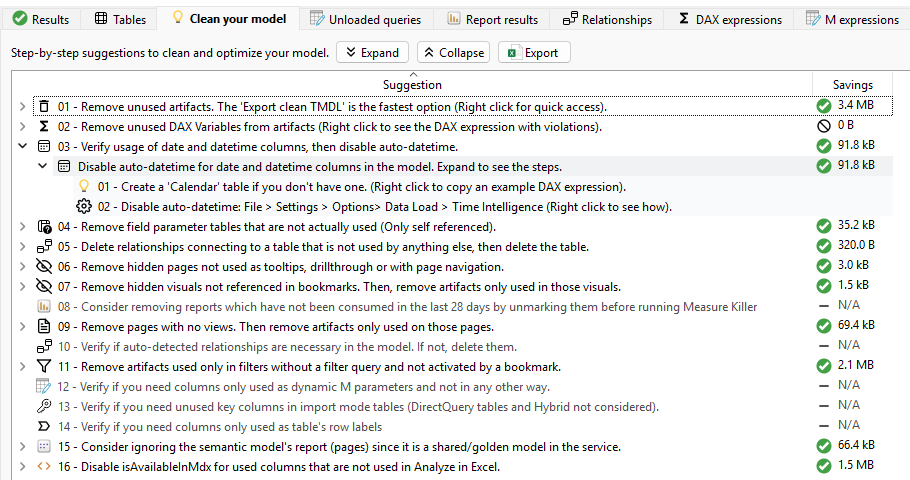
Don’t have a key yet? Request a free trial — the trial unlocks every paid feature against your own Power BI file.
Now remove what’s unused
The scan tells you what is unused — the next step is acting on it. Find and remove unused measures and columns is the dedicated walkthrough: it covers every removal method (Clean TMDL, 1-click cleanup, Kill DAX, Kill columns), which one to pick, and how to delete safely. Applied locally in Power BI Desktop, it’s free.
Next steps
- Run your first online scan — same idea, but against shared semantic models in the Power BI Service (paid).
- Best-practice analysis